The easiest way to schedule an Anatella graph is to follow this procedure:
1.Open the Anatella graph to schedule inside Anatella.
2.Inside Anatella, open the “Automation” drop-down menu and select “Schedule this graph for recurrent execution”:

3.In the first configuration screen, you select if you want to:
•Update an old Job: select it here: ![]()
•Create a new Job: click here: ![]()
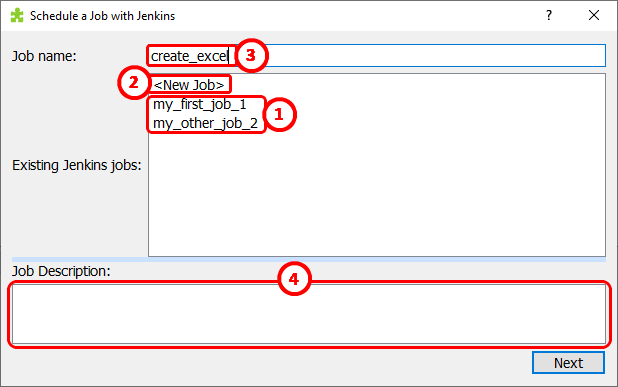
If we are creating a new job, we define its name here: ![]()
We can also edit the job description here: ![]()
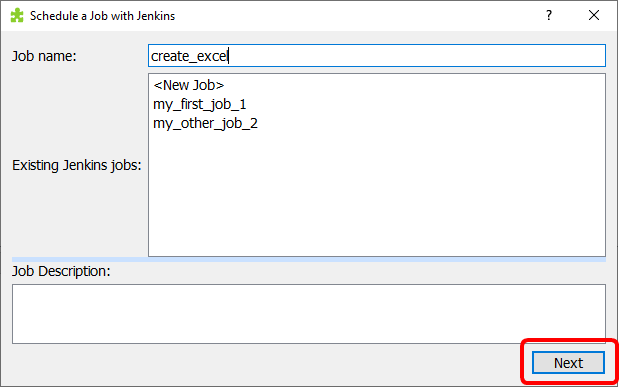
Click the “Next” button to go to the next configuration screen:
4.In the second configuration screen, we select WHEN we want to run our graph: every minute, hourly, dayly, weekly, monthly, never. These settings are all self-explanatory. To have even more control on when the graph is running, we can also use here a free-form “CRON expression”. Please refer to the section 4.8.6 for the explanation of the syntax used to create these “CRON expressions”.
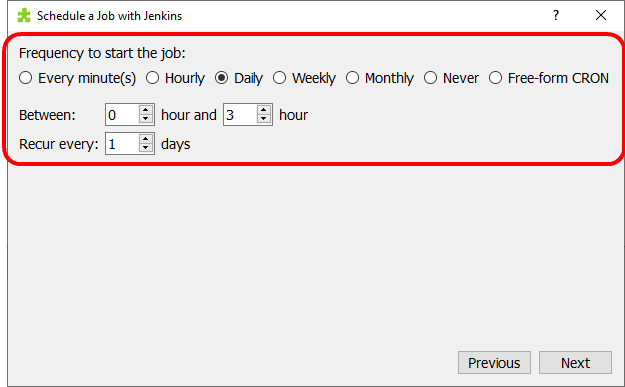
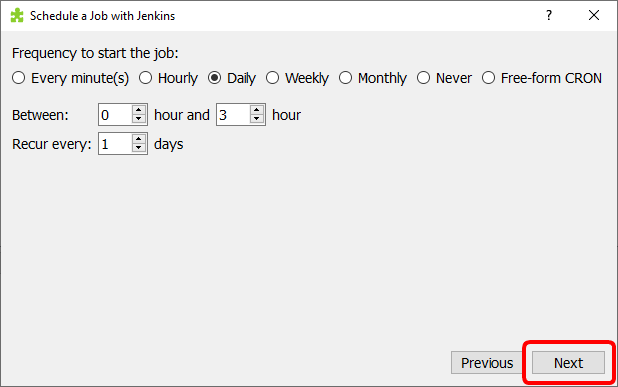
Click the “Next” button to go to the next configuration screen:
Actually, Jenkins supports many other ways to automatically starts an Anatella job (in addition to the “build periodically” option). For example, you can start an Anatella Job when: a specific email arrives, a connection to a specific
URL happens, a file appears in a directory, etc. For more details on this subject, please refer to the “Jenkins build trigger plugins” listed here:
https://plugins.jenkins.io/ui/search?sort=relevance&labels=trigger&view=Tiles
You must use the classical Jenkins web interface to parametrize these other special “triggers”: see the step 23 inside the section 4.8.2. for more details on how to install new “triggers”.
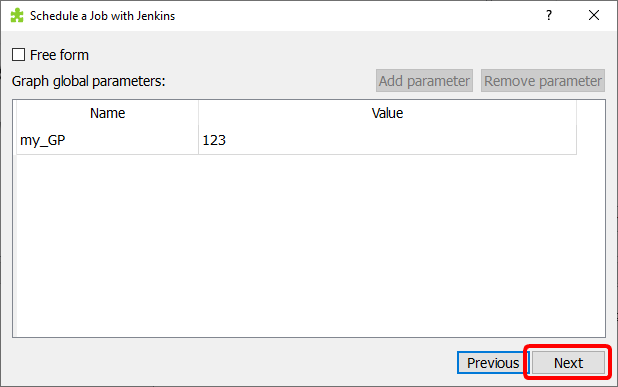
5.The third configuration screen only appears when, either:
•You click the “Previous” button from the fourth&last configuration screen.
•You have some “Global Parameters” defined inside your graph.
This means that, most of the time, the third configuration screen will be totally skipped and invisible (i.e. you directly arrive to the fourth&last configuration screen).
In the third configuration screen, you select if you want full control on the exact DOS-Batch Commands executed by Jenkins: In this case: you check this checkbox: .
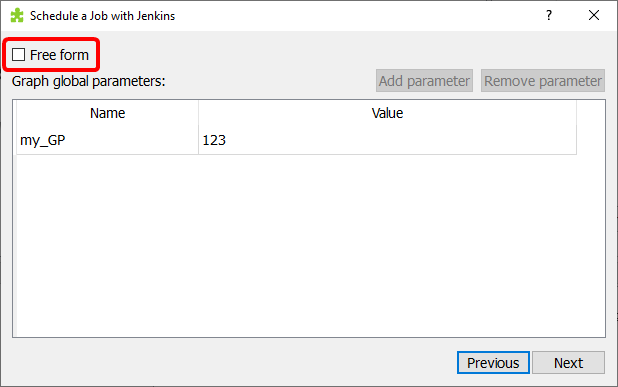
Warning: 99% of the time, you should let this checkbox unchecked.
On this same configuration screen, you can also decide to change the value of some of the “Global Parameters” from you graph.
Click the “Next” button to go to the next configuration screen:
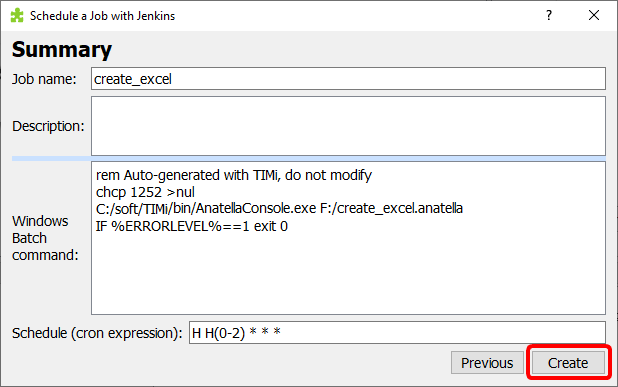
6.The fourth and last configuration screen is a summary of all the settings entered in the previous screens. You cannot edit anything on this screen. Click the button in the bottom right corner to create (or update) your Anatella job inside Jenkins:
7.Congratulation! You just placed your first Anatella graph in production! Yes! ![]()
You should now go to the next section 4.8.5. to know how to TEST the graphs that are scheduled in production inside Jenkins.
The above procedure is the standard & minimal procedure to schedule the execution of an Anatella Graph using Jenkins. This is just a (very) simple example: Jenkins offers many more options (especially after installing the many extentions & plugins that are available). The standard web interface to Jenkins offers many more capabilities and settings. Do not hesitate to explore them!
4.8.4.1 A small explanation on the “Windows Batch commands” text field in the last configuration screen:
You can safely skip the remainder of this section if you are not interested.
The default windows batch commands are, typically:
Rem Auto-generated with TIMi, do not modify chcp 1252 >nul "c:/soft/TIMi/bin/AnatellaConsole" "<filepath_to_my_graph>" IF %ERRORLEVEL%==1 exit 0 |
If you defined some “Custom Jenkins Initialization Scripts” (see the step 24 in the section 4.8.2. for more information about these scripts), you’ll rather have something like this:
Rem Auto-generated with TIMi, do not modify chcp 1252 >nul "c:/soft/TIMi/bin/AnatellaConsole" "d:/weeklyReport.anatella" IF %ERRORLEVEL%==1 exit 0 |
…where we have:
•"Rem Auto-generated with TIMi, do not modify": is a marker that Anatella uses to detect if this set of batch commands are “free form” or auto-generated.
•"chcp 1252 >nul": is an optional command-line.
This command allows you to use non-standard characters (e.g. accentuated characters such as é,è,ê,à,ù,etc.) inside the filePath of the Anatella graphs to run.
![]()
1252 is the most common code page (also called “character set”) used by Java programs (Jenkins is a Java program). The 1252 code page stands for “Latin 1”: it’s the most common code page used in Europe/US.
•"net use Z: \\My_File_Server\public /Y" is an optional command-line to “mount” network drives (see the step 24 in the section 4.8.2.)
•"c:/soft/TIMi/bin/AnatellaConsole" is the location of the “Anatella Console” executable.
•"d:/weeklyReport.anatella" is the location of the Anatella graph to run.
•The last line (i.e. the line that contains “IF %ERRORLEVEL%==1 exit 0”) is required to tell Jenkins that, when the “Error Level” returned by the Anatella engine (after the graph has finished running) is 1, it actually only means a simple “warning” and it does not mean a critical execution error of the Anatella Graph. Without this line, Jenkins will interpret all simple warnings as critical errors (and this is usually quite bad).