Anatella automatically replaces a serie of specific images inside your .docx/.pptx template documents. These images are your “Image Markers”. These “marker images” have specific filenames that must match the names given inside the parameter P4 of the ![]() writeDoc action. These “marker images” must be inserted inside your document following a very specific procedure:
writeDoc action. These “marker images” must be inserted inside your document following a very specific procedure:
Insertion of “Marker Images” inside a .docx document
1.Open your .docx document with MS-Word and position your cursor where you want to insert your “marker image”.
2.Inside the “Insert” toolbar in MS-Word ![]() , click on “Quick Parts”,
, click on “Quick Parts”, ![]() and select “Field”:
and select “Field”: ![]()

3.Inside the list on the left column, select “IncludePicture”.![]()
IMPORTANT: Inside the “Field options” on the right column, check the checkbox named “Data not stored with document”. ![]()
Inside Filename parameter the middle column, select an image filepath ![]() . The filename of this image is the name of your “Image Marker”. Click Ok.
. The filename of this image is the name of your “Image Marker”. Click Ok. ![]()
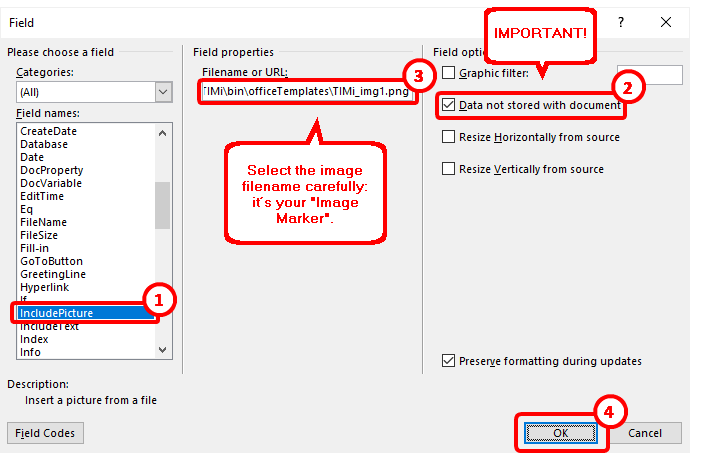
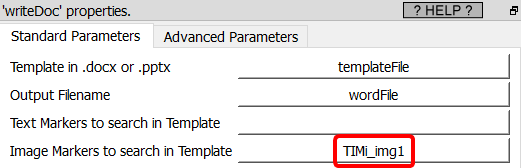
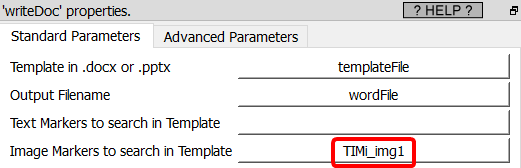
In the example above we choosed (as our image filepath), the filepath “C:\soft\TIMi\bin\ officeTemplates\TIMi_img1.png”. This means that the name of the “Image Marker” related to this image is “TIMi_img1” and we need to set “TIMi_img1” inside the parameter P4 here so that Anatella is able to change this image.
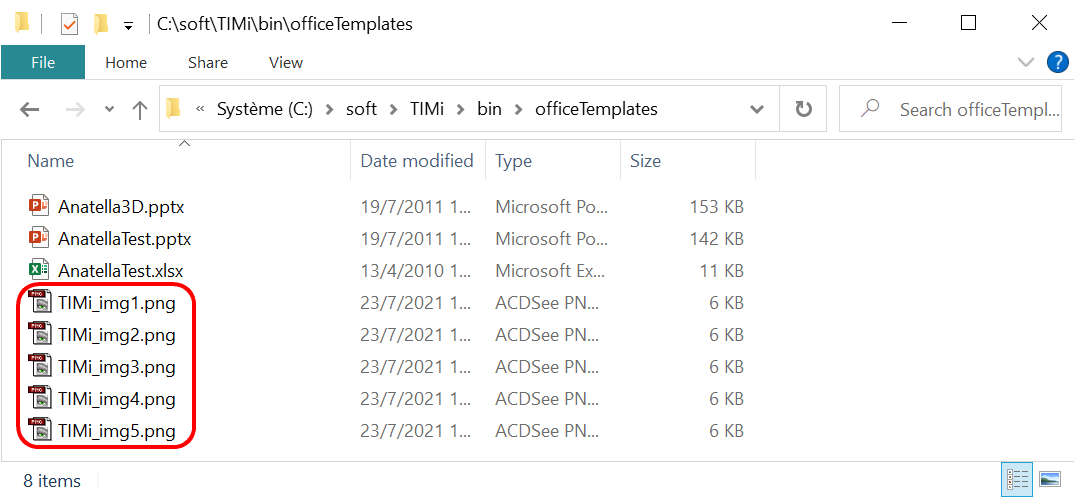
You’ll find a prepared set of images (with meaningful filenames) to help you design your templates inside the directory “<TIMi_install_dir>/bin/officeTemplates” (at this point, you can really use any image content and any image filename but these images might still help you):
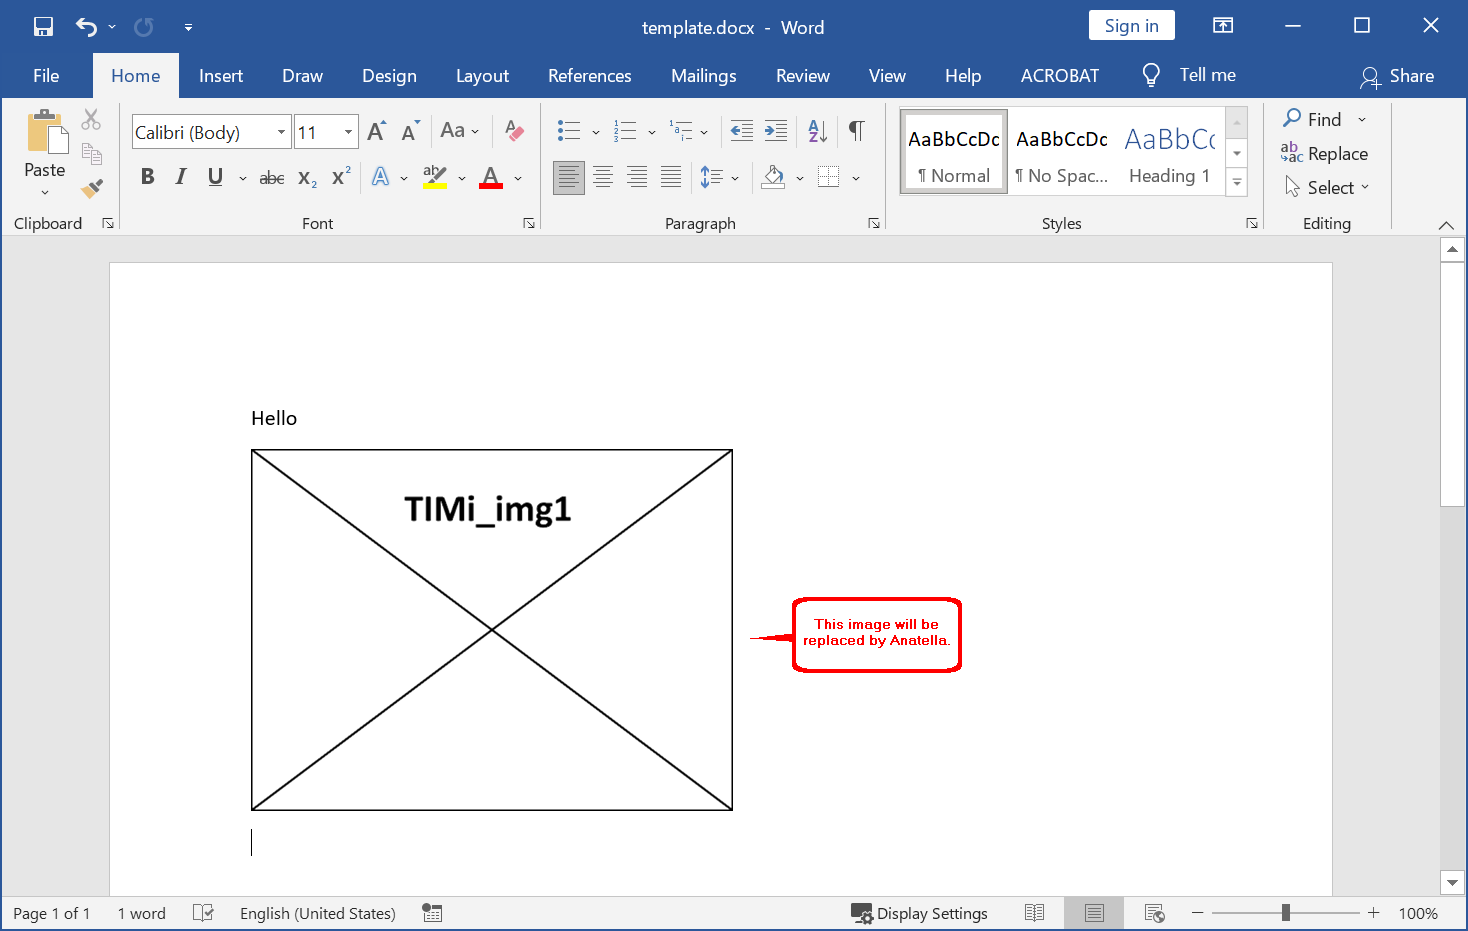
4.We now see inside MS-Word:
Insertion of “Marker Images” inside a .pptx document
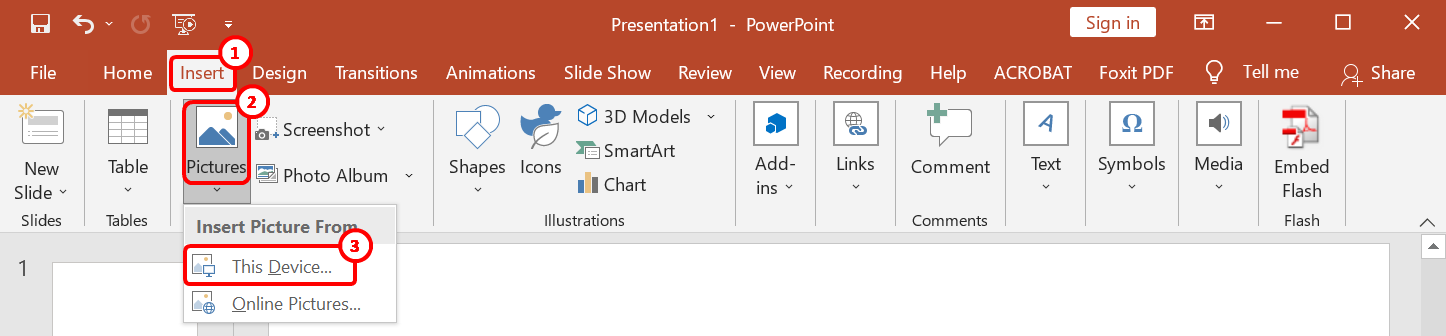
1.Open your .pptx document with MS-PowerPoint and go to the slide where you want to insert your “marker image”.
2.Inside the “Insert” toolbar in MS-PowerPoint ![]() , click on “Pictures”,
, click on “Pictures”, ![]() and select “This Device…”:
and select “This Device…”: ![]()
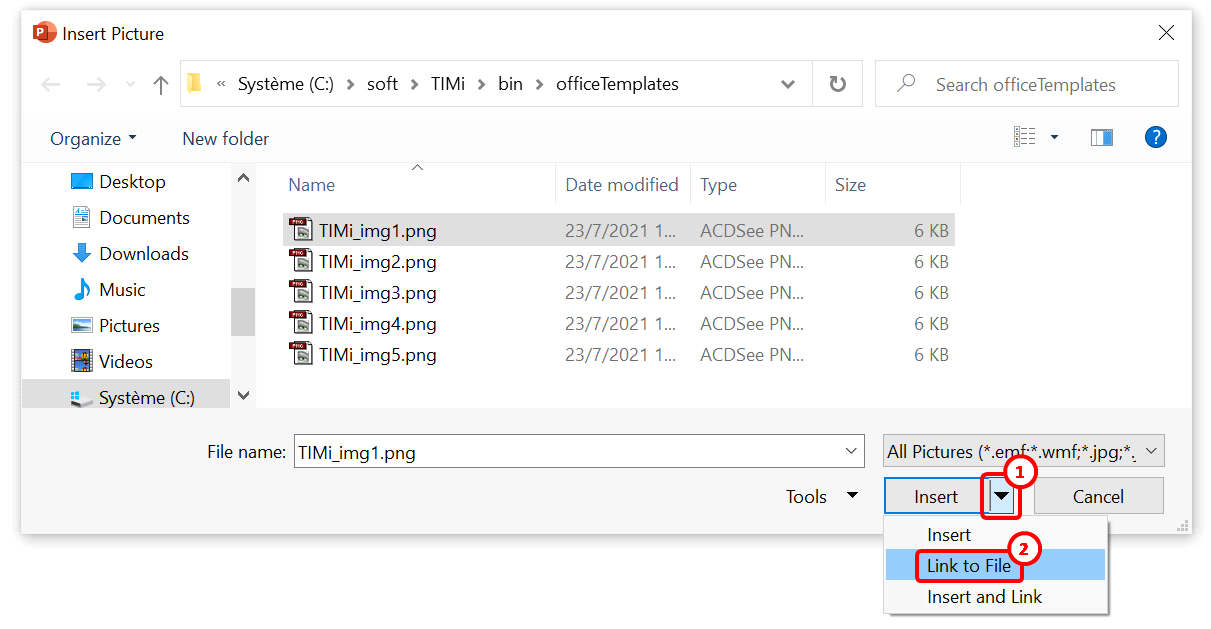
3.Inside the file browser window, select an image file. The filename of this image is the name of your “Image Marker”. In the example here below, the “Image Marker” is “TIMi_img1”. This means that we need to set “TIMi_img1” inside the parameter P4 here
so that Anatella is able to change this image.
4.IMPORTANT: Click on the ![]() arrow (inside the “insert” button)
arrow (inside the “insert” button) ![]() and select “Link to File”.
and select “Link to File”. ![]()
Do not simply click the “Insert” button directly: you must click on “Link to File” sub-option.
5.We now see inside MS-PowerPoint:
