5.1.6.7.1. ODBC Driver installation
The “IBM DB2 ODBC” driver is very quick to install. The connection from Anatella to DB2 is usually setup in a few minutes.
Follow these steps:
1.Unzip the zip file containing the IBM DB2 ODBC driver.
For your convenience, you can go here to download the latest DB2 ODBC drivers:
http://download.timi.eu/ODBC/ODBC_drivers_IBM_DB2/
2.Important: Don’t run now any executable that originates from the ZIP file: First and before, you have to move the extracted content of the zip file to the final destination folder: Typically, you’ll have:
On a 64-bit system for a 64-bit ODBC driver: Copy the files into “C:\Program Files\IBM”
On a 64-bit system for a 32-bit ODBC driver: Copy the files into “C:\Program Files (x86)\IBM”
On a 32-bit system for a 32-bit ODBC driver: Copy the files into “C:\Program Files\IBM”
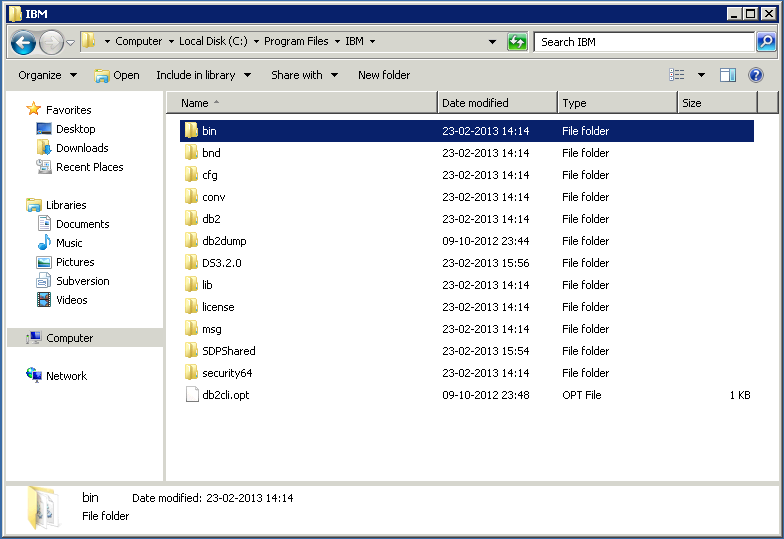
For example, on my 64-bit system (and 64-bit ODBC driver), I will have the following files:
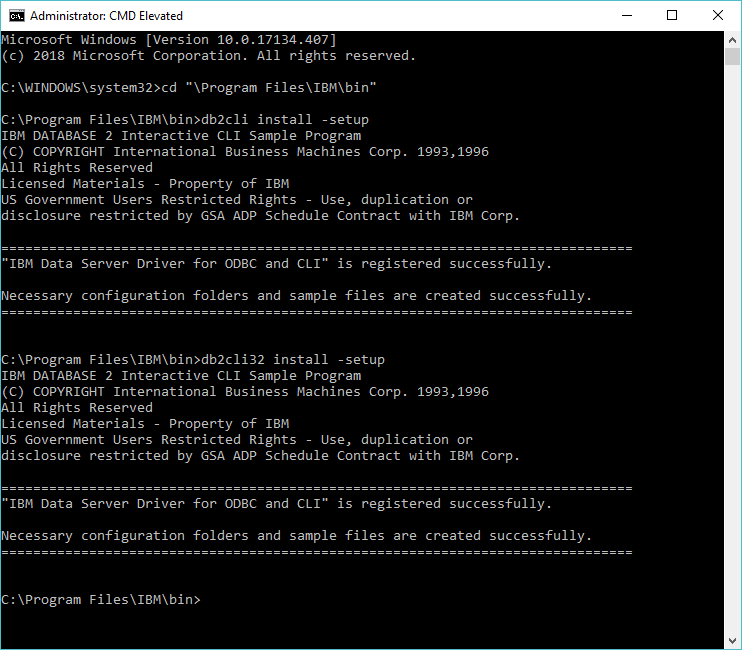
3.Open an “Administrator Command Prompt” (right-click on the command prompt and choose "Run as administrator"), go to the install folder (e.g. “c:\program files\IBM\bin”) and type:

Here is an illustration of the procedure:
5.1.6.7.2. ODBC Driver Configuration to create a Type 1 ODBC connection to DB2
The procedure to create a Type 1 ODBC connection to IBM DB2 is the following:
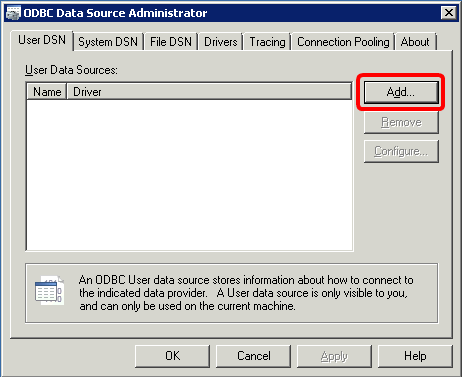
1.Open the “Microsoft ODBC Administrator” (see the section 5.1.6.1. to have more details on how to open the “Microsoft ODBC Administrator”)
2.Click the "Add…" Button to create a new ODBC DSN:
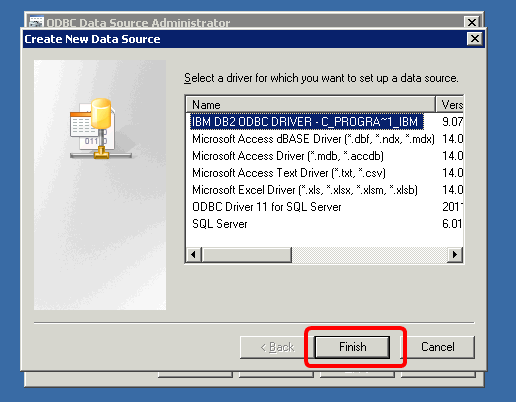
3.Choose the DB2 ODBC-driver and press the Finish-button:
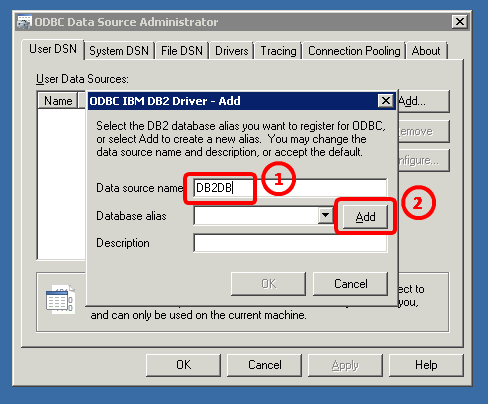
4.Give now the “ODBC DSN Link name” that you’ll use inside Anatella to select the connection to your DB2 database. Here I have just given it the name DB2DB.![]()
5.Click the “Add” Button:![]()
6.Go to the Advanced Settings-tab and press the “Add” button here ![]() several times: i.e. you need to “add” the following settings:
several times: i.e. you need to “add” the following settings:
oDatabase: Should point to the database that you want to connect to.
oHostname: Should point to the server where your DB2-server is installed.
oPort: The portnumber where the DB2-server on the Hostname is responding.
oProtocol: The protocol used to connect to the DB2-server (most of the time, select TCP/IP) .
The final settings should be something like this:
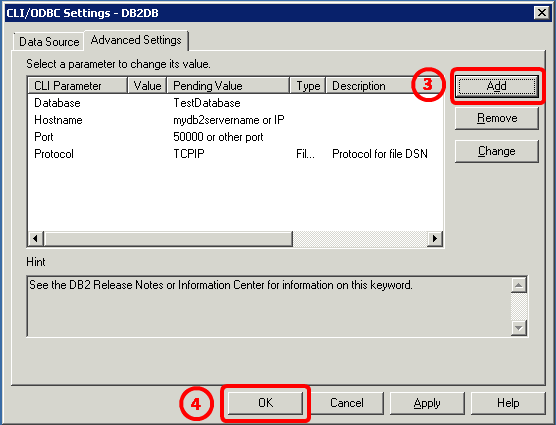
7.Click the “OK” button here ![]() and you are done!
and you are done!
5.1.6.7.3. DB2 Unicode Character Support
Inside Anatella, all the characters are Unicode. This means that Anatella can handle any characters (e.g. any Chinese chars, any Cyrilic chars, any accentuated chars).
By default, inside DB2, the fields that are declared as “VARCHAR()” are not Unicode. For example, this means that DB2 will report an error if you use Anatella to insert any accentuated character (such as é,è,à,…) inside a “VARCHAR()” field. The solution is to never use any “VARCHAR()” fields and always use “VARGRAPHIC()” fields instead (when you declare a new field containing some characters inside a “CREATE TABLE” statement). More details: The “VARGRAPHIC()” fields are Unicode and can accommodate any character that Anatella might want to INSERT.
To remind you: The ![]() CreateTable automatically generates a “CREATE TABLE” statement based on the data contained inside the table to INSERT inside the database. Unfortunatelly, by default, inside the auto-generated “CREATE TABLE” statement, all the columns that contain some characters are declared as “VARCHAR()” and not “VARGRAPHIC()”: i.e. This won’t work properly inside DB2. This means that you must manually edit the auto-generated “CREATE TABLE” statement to replace all “VARCHAR” strings with the “VARGRAPHIC” string. Alternatively, instead of manually editing the “CREATE TABLE” statement, you can use the following JS code inside the “For Expert Users” panel of the
CreateTable automatically generates a “CREATE TABLE” statement based on the data contained inside the table to INSERT inside the database. Unfortunatelly, by default, inside the auto-generated “CREATE TABLE” statement, all the columns that contain some characters are declared as “VARCHAR()” and not “VARGRAPHIC()”: i.e. This won’t work properly inside DB2. This means that you must manually edit the auto-generated “CREATE TABLE” statement to replace all “VARCHAR” strings with the “VARGRAPHIC” string. Alternatively, instead of manually editing the “CREATE TABLE” statement, you can use the following JS code inside the “For Expert Users” panel of the ![]() CreateTable Action:
CreateTable Action:
function run()
{
var s="",i,n=columns.length,c;
if (dropTable) s+="DROP TABLE IF EXISTS "+tableName+";\n";
s+="CREATE TABLE "+tableName+" (\n";
for(i=0;i<n;i++)
{
c=columns[i];
s+=" "+c.name+" ";
if (c.declaration!=null) s+=c.declaration;
else
{
switch (c.type)
{
case 'F':
if (useFloat53) s+="float(53)";
else s+="float(24)";
break;
case '0': case 'K':
s+="dec("+Math.ceil(mmax(c.len,1)*integerF1+integerF2)+")";
break;
case 'U':
s+="vargraphic(50)";
break;
default :
s+="vargraphic("+Math.ceil(mmax(c.len,1)*varCharF1+varCharF2)+")";
break;
}
if (pkIsNotNull&&c.isPK) s+=" NOT NULL"
}
if (i+1!=n) s+=",\n";
}
if (autoPK.length>0) s+=",\n "+autoPK+" NOT NULL AUTO_INCREMENT";
else if (listPK.length>0)
{
n=listPK.length;
s+=",\n PRIMARY KEY ("+listPK[0];
for(i=1;i<n;i++) s+=","+listPK[i];
s+=")";
}
s+="\n);\n";
return s;
}