Let’s give a small example of usage. In the below example, we’ll create a new “Type 2” ODBC connection to access the content of a “Microsoft SQLServer database”. The technique is similar for all the databases (Oracle, Teradata, SQL Server, DB2, etc.). You’ll find additional information for the proper setup of an ODBC connection to an Oracle, Teradata, MySQL & Sybase database in the sections 5.1.6.3. to 5.1.6.6.
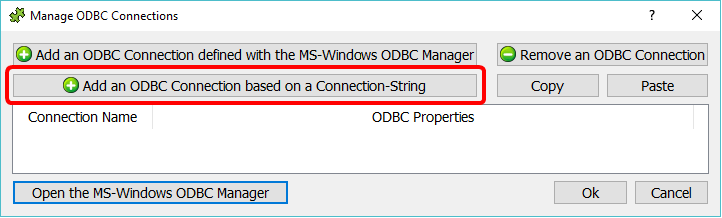
Inside Anatella, inside the “Manage OBC Connections” window, click the button named “Add an ODBC connection based on a Connection-String”:
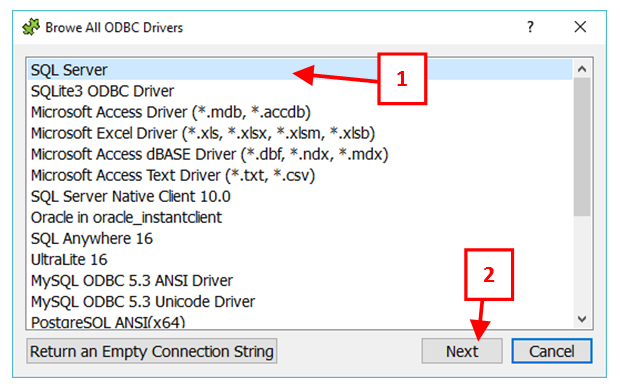
A window that lists all the installed ODBC drivers opens. Since we want to access the content of a “Microsoft SQLServer database”, we’ll select the “SQL Server” ODBC driver on the first line (Thereafter, we click the “Next” button and we wait: i.e. The next Window usually appears after a long time):
For your convenience, you can go here to directly download the most common ODBC drivers (for MS-SQLServer, Oracle, Teradata, MySQL, SQLite, Access, Sybase, DB2):
The above drivers have been thoroughly tested and are known to work well with Anatella.
![]()
If you cannot see an ODBC driver that you just installed, it means that you are using the 64-bit “Microsoft ODBC Administrator” software (for Anatella 64-bit) and you installed some 32-bit ODBC drivers (or vice versa).
Be sure to install 64-bit ODBC drivers to be able to use Anatella 64-bit
(or install 32-bit ODBC drivers, if you want to use Anatella 32-bit).
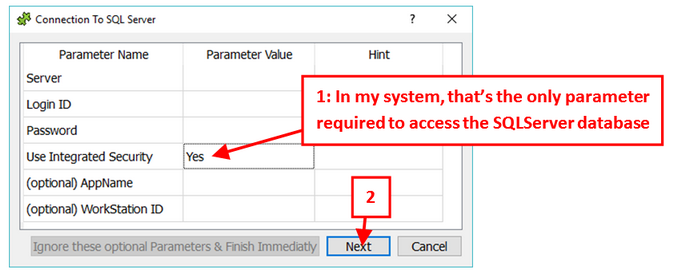
All the next Windows are all based on the same canvas: They are progressively collecting all the required informations to properly contruct the connection string. For example, the first requested parameters are:
The second set of requested parameters are:
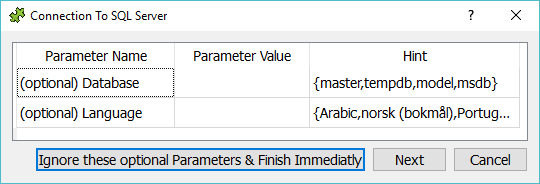
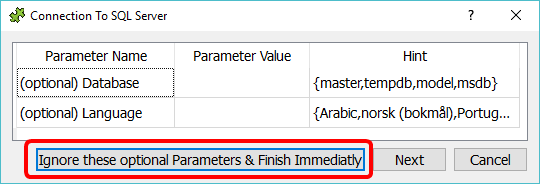
Since, inside this second set, all the parameters are optional, you can skip all later steps and directly click the “Finish Immediately” button here:
We should now have one additional row/connection inside the “Manage OBC Connections” window:
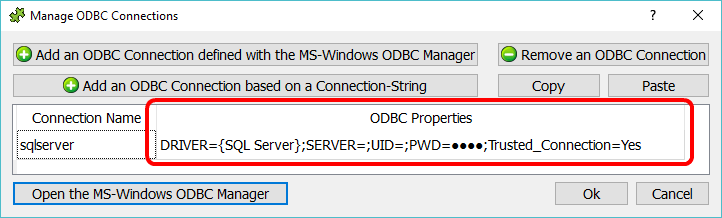
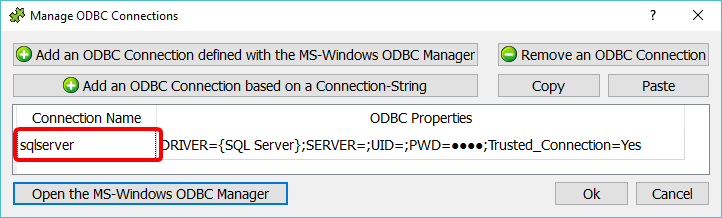
Let’s give a proper name to this new connection: In the example above, the name is “sqlserver”:
The setup of our new ODBC connection is now complete. This means that we can now use our new ODBC connection inside a ![]() readODBC action (see section 5.2.3) or inside a
readODBC action (see section 5.2.3) or inside a ![]() upsertODBC action (see section 5.26.4).
upsertODBC action (see section 5.26.4).
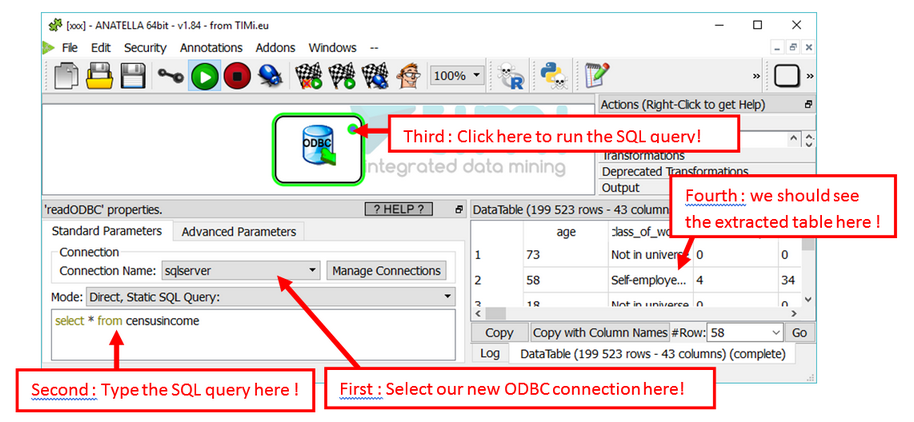
For example: Let’s use a ![]() readODBC action to extract the table “censusincome” from our SQLServer database:
readODBC action to extract the table “censusincome” from our SQLServer database: