You can download QGIS from here (1GB download):
https://qgis.org/en/site/forusers/download.html
The installation wizard is simple and straightforward.
Let’s now assume that we have two shape files:
•“SHOPS.shp”: a shape file with the geometry column that contains the coordinates (latitude, longitude) of the shops. One row per shop.
•“SHOPS_ CATCHMENT_AREA.shp”: a shape file with the geometry column that contains the polygons that defines the catchment area for each shop. One row per shop.
See the section 5.10.13 about the ![]() Tesselate action for an example on how to compute&create these catchment areas.
Tesselate action for an example on how to compute&create these catchment areas.
We’ll create a new vizualisation inside QGIS with 3 layers:
•Bottom layer: the “Open Street Map” Tile layer to have “context”.
•Middle layer: the catchment areas for all shops (i.e. the geometries from “SHOPS_CATCHMENT_AREA.shp”).
•Top layer: many dots with the position of the shops and their name/id (i.e. the data from “SHOPS.shp”).
Here are the steps:
1.Run “QGIS Desktop”.
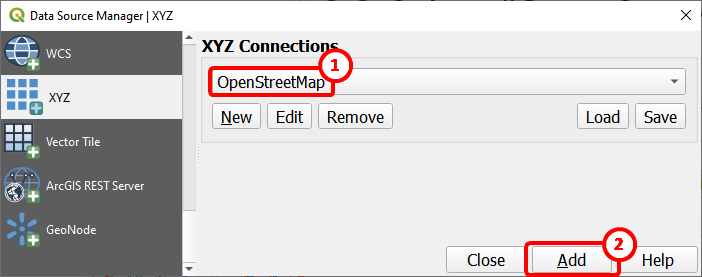
2.2. Add the “Open Street Map” layer:
2.1 Open the dropdown menu “Layer”, select “Add Layer”, click on “Add XYZ Layer”:

2.2 Select “Open Street Map” ![]() (this should be already selected) and click the “Add” button
(this should be already selected) and click the “Add” button ![]() :
:
3. Add the layer with the “catchment area” for each shop:
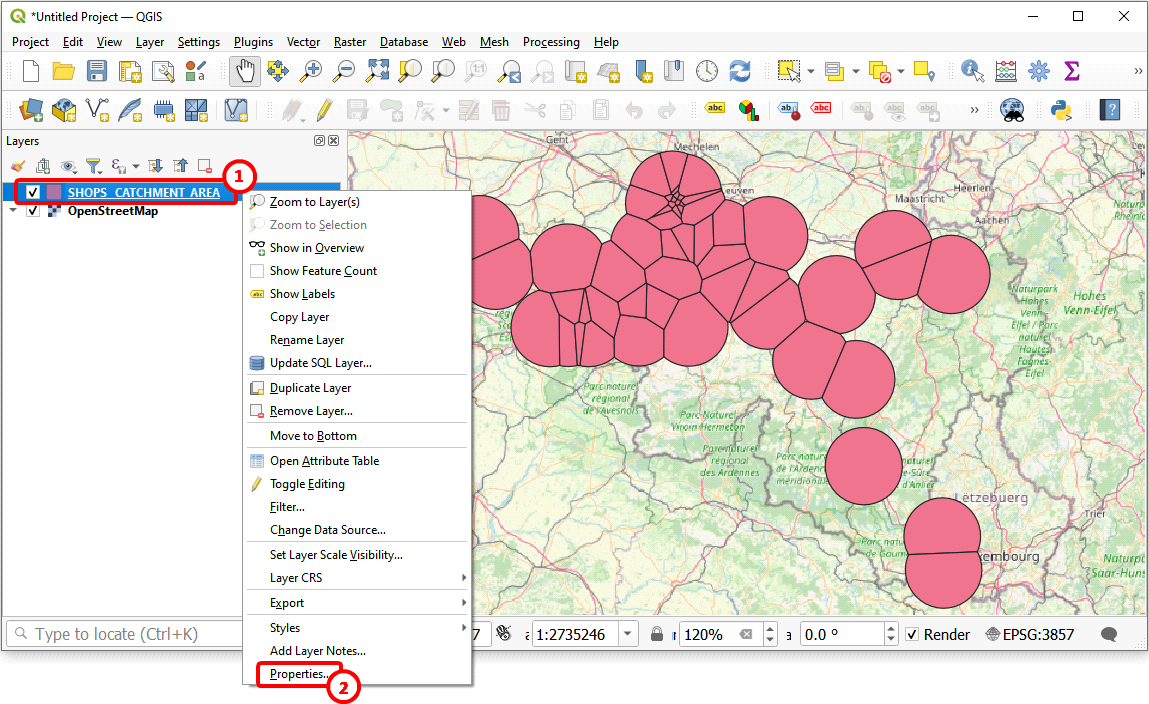
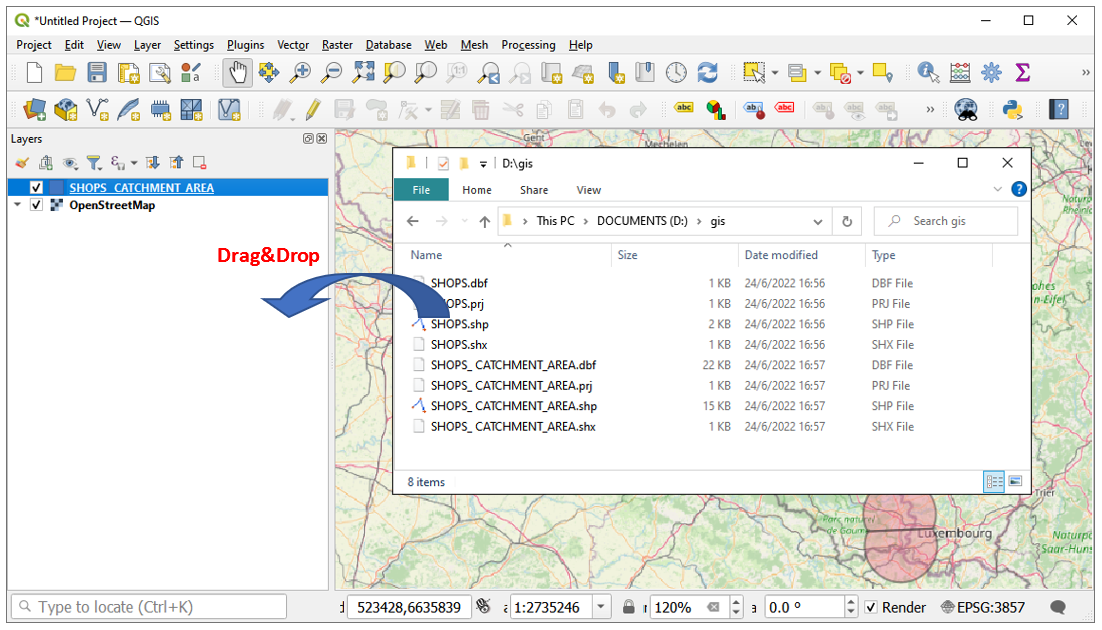
3.1 Drag&Drop the “SHOPS_ CATCHMENT_AREA.shp” inside the QGis window:

|
If you see this error message:
… it means that you have a .shp file but one of the other required accompagnying files (i.e. the .dbf file, the .shx file or the .prj file) is missing. |

3.2 Make this layer semi-transparent:
•Right-click the new layer ![]() and select “Properties” inside the context-menu
and select “Properties” inside the context-menu ![]() :
:
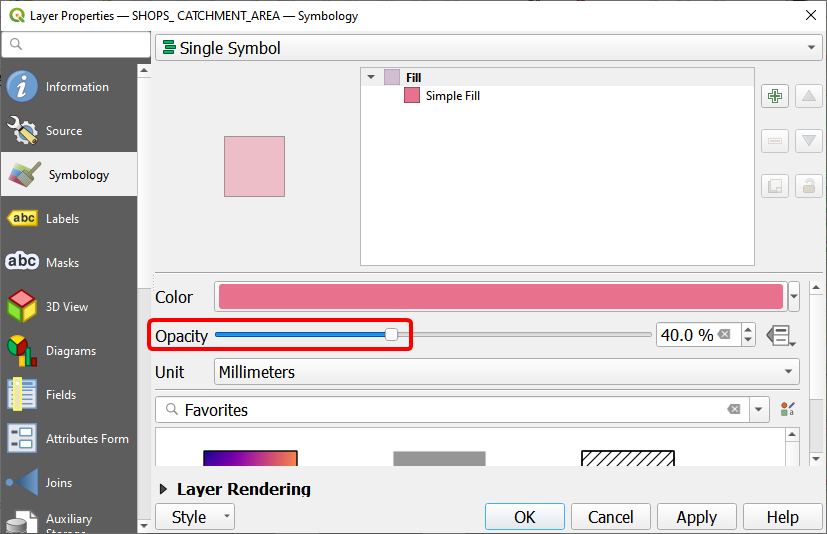
•Move the “Opacity” slider to 40%:
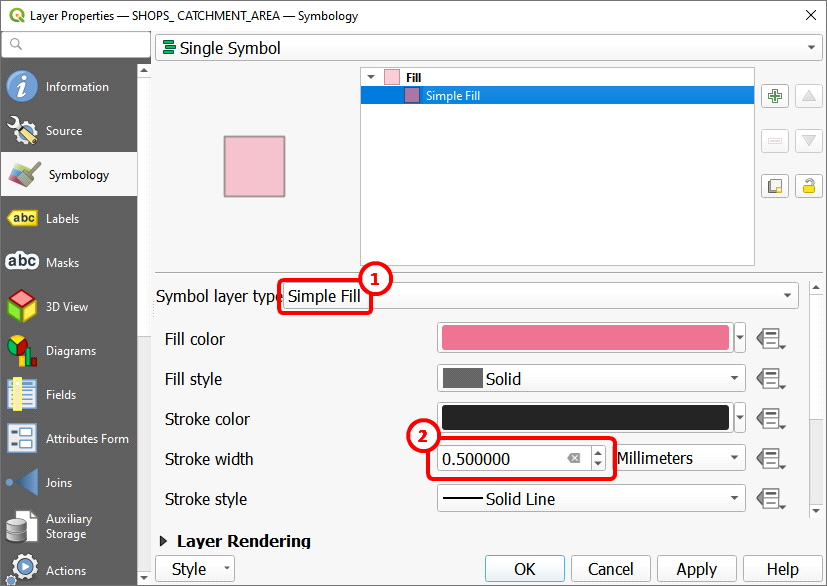
3.3 Increase the thickness of the border of the geometries: Click on the “Simple Fill” style ![]() and increase Stroke width to 0.5 millimeter
and increase Stroke width to 0.5 millimeter ![]() :
:
4. Add the layer with the positions of the shops:
4.1 Drag&Drop the “SHOPS.shp” inside the QGis window:
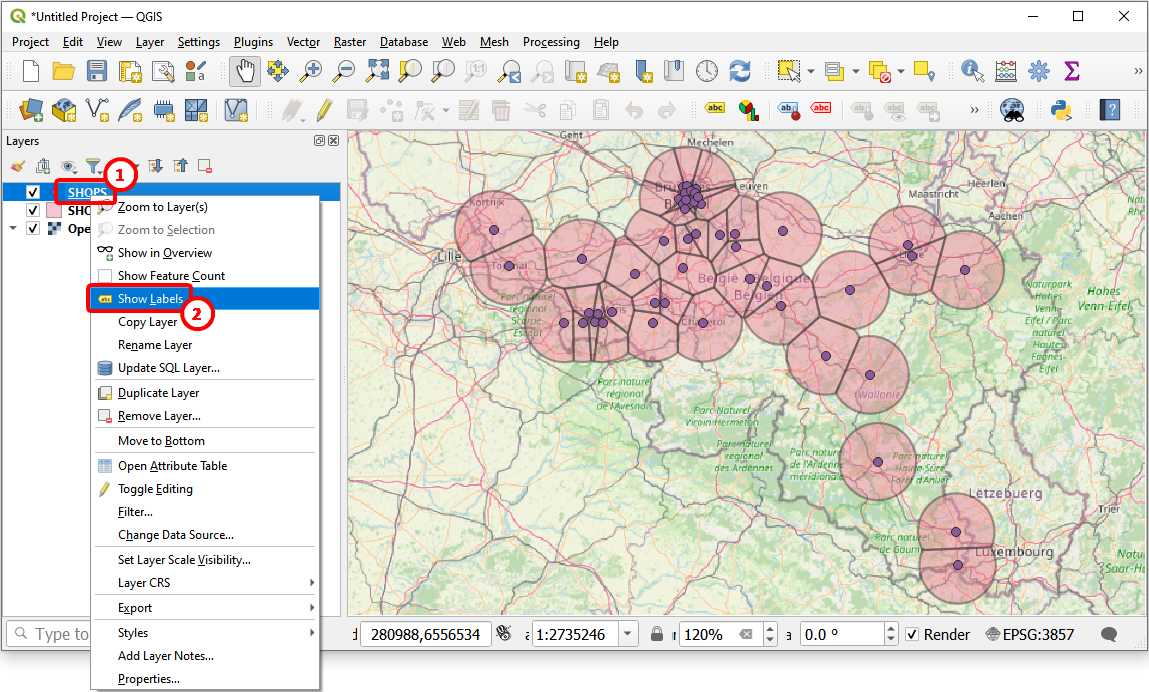
4.2 Add Labels to your shops: Right-click the new “SHOPS” layer ![]() and select “Show Labels” inside the context-menu
and select “Show Labels” inside the context-menu ![]() (the Labels come from the content of the first column inside the .shp file):
(the Labels come from the content of the first column inside the .shp file):
5. (optional) Add decorations: Open the drop-down menu “View”, select “Decorations” and add a “Scale Bar” and a “North Arrow”.
6. (optional) Save your design (press [CTRL]+[S]) to be able to reuse your design to quickly produce an updated map with new, updated shape files.
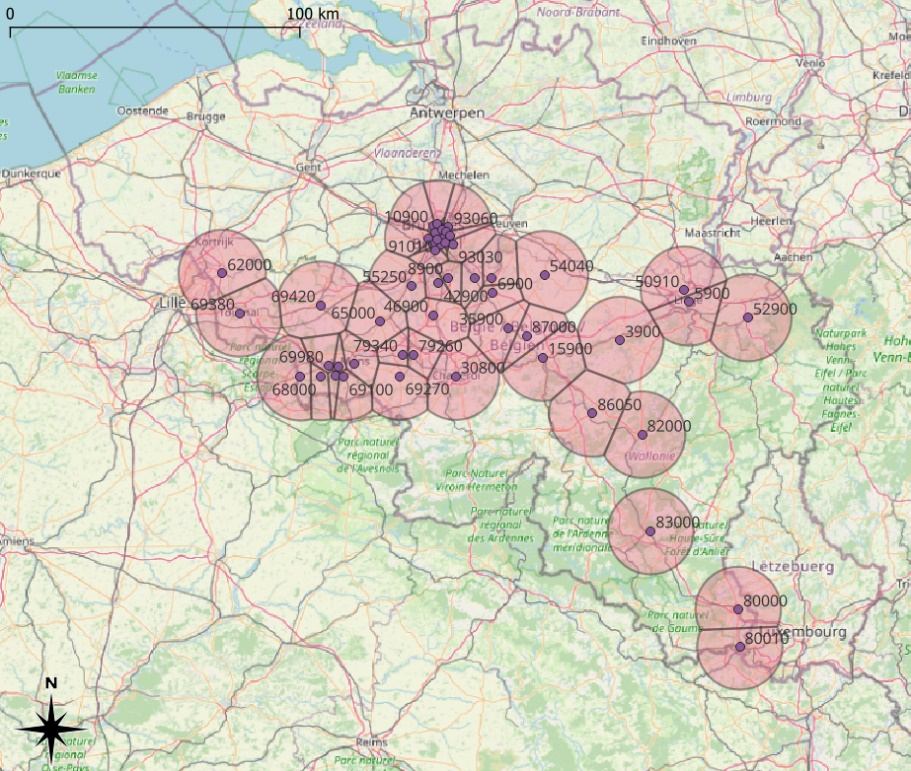
Here is the final result: